
Introduction: Unleashing Creativity with The Arduino Nano Starter Guide
As we explore the world of DIY electronics, one small powerhouse is creating quite a stir: the Arduino Nano. The Arduino nano is more of a microcontroller, providing an opportunity for curators, innovators, and revolutionaries to break away from the box.
What exactly is Arduino Nano?
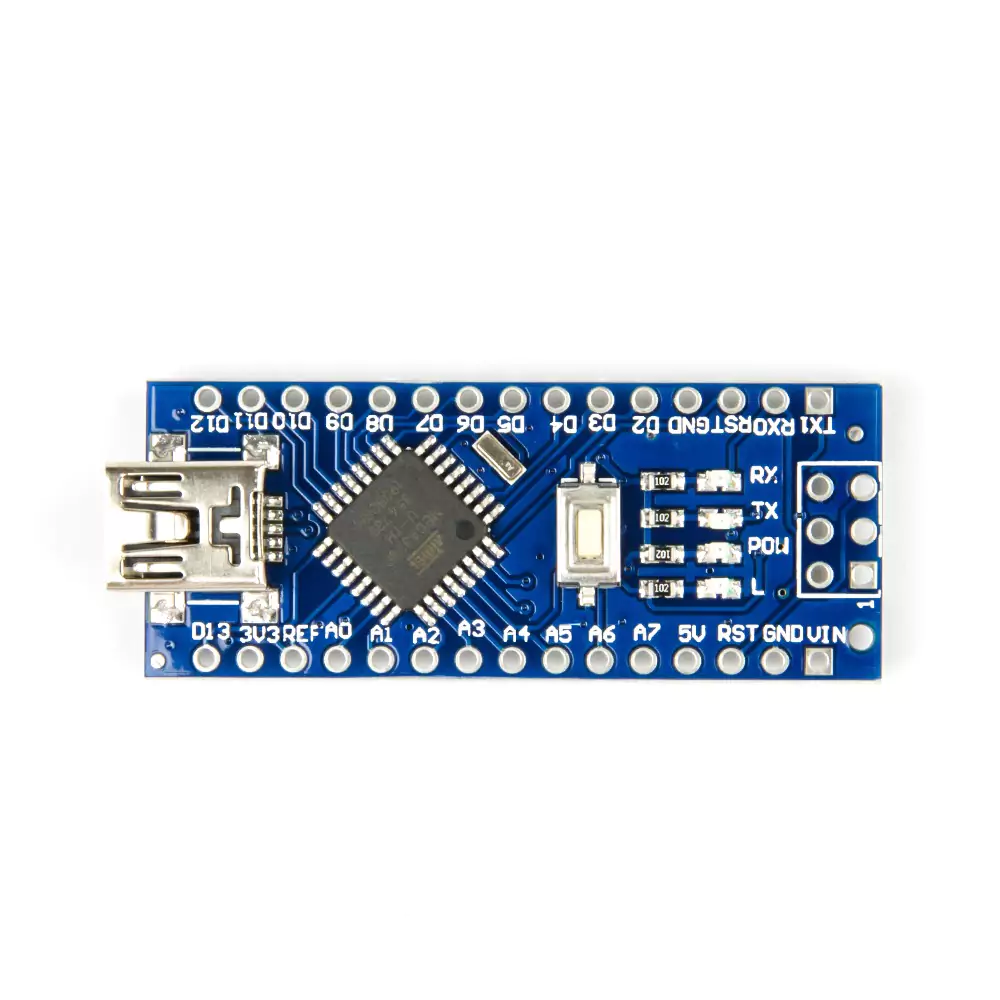
The Arduino Nano is essentially a compact yet powerful piece of technology with capabilities similar to the Arduino Uno. It operates on the Atmega328P microcontroller and comes equipped with integrated channels for input, output, and communication. Despite its relatively small footprint, it offers a wide range of features that can manage intricate projects. This makes it a favorite for DIY enthusiasts, teachers, and tech professionals. Moreover, its cost-effectiveness and user-friendly nature have fostered its use in creative innovations, internet-linked projects, education-based programs, and for crafting prototypes.
What makes Arduino Nano a Tech Darling?
This modest board packs a substantial punch. Despite its compact size, the Arduino Nano boasts incredible abilities, including compatibility with a wide array of components – making it the perfect tool for everyone, from beginners to seasoned tech adepts.
With its accessibility and user-friendly approach, Arduino Nano is breaking down the barriers that previously surrounded the shapes and structures of the tech world.
Extracting the Full Potential of Arduino Nano
Whether you’re interested in basic robotics or intricate IoT systems, Arduino Nano offers a platform where your creativity can soar. Built on an open-source ethos, the Arduino Nano is not just a gadget but a vibrant and inclusive community of tech enthusiasts the world over.
Convenient and mobile, the Arduino Nano is designed to take your projects from concept to reality – with a dash of fun thrown in.
Application : The Arduino Nano at Work
Arduino Nano has graced a variety of projects – from automated smart home systems to creative art installations and innovative wearables. Leveraging the capabilities of Arduino Nano broadens your imagination’s horizon and manifests your wildest tech dreams into reality.
An Overview of Arduino Nano’s Pinouts
Understanding the pinout diagrams of Arduino Nano tackles half the journey in this Arduino nano starter guide – it navigates you to interact and interface with various components effectively.
Arduino Nano’s 30-pin marvel gives it the edge in terms of flexibility. The pinout cluster includes 14 digital I/O pins, 8 analog input pins, 6 power pins along with Reset and AREF pins. Specific pins have alternative functions too – pins D2 and D3 act as Interrupt pins, D10-D13 provide SPI communication, while A4 and A5 are aligned for Two-Wire Interface or TWI communication.
The palette of options encourages users to experiment with components and functionalities like never before!
3 Easy Arduino Nano Projects
This Arduino nano starter guide will provide you easy projects to kick start your nano adventure. Here are three simple yet exciting projects you can quickly get on board with.
1. Creating A Temperature Sensor
For this setup, you’re required to have an Arduino Nano, a breadboard, a thermistor, and some connecting wires.
Setup: Connect one end of the thermistor to A0 (analog pin) and the other end to GND (ground pin) on the Nano. Now make a connection between A0 and 5V with a 10K resistor.
Code: Use analogRead() function to read the value from A0 and apply a suitable formula to convert the reading into temperature.
2. DIY Light Intensity Meter
For this setup, you’re required to have an Arduino Nano, an LDR (Light Dependent Resistor), a breadboard, and some wires.
Setup: Connect one end of the LDR to A1 (analog pin) and another to GND on the Nano just as you did with the thermistor in Project 1. And also connect A1 and 5V using a 10K resistor.
Code: Use analogRead() function to read light intensity from the LDR.
3. Automated LED Blinker
This project’s simplicity maintains the charm! You’ll need an Arduino Nano, an LED light, a breadboard, and some essential wires.
Setup: Mount the LED on the breadboard and connect its longer (anode) leg to D2 (digital pin) and shorter (cathode) one to GND on the Arduino Nano.
Code: Use digitalWrite() function to control the LED’s state, and delay() function to control blinking intervals.
By working on these projects, you’ll certainly get yourself to a great start with Arduino Nano!
Conclusion : Infusing Creativity in Technology with Arduino Nano
With the Arduino Nano, your big tech ideas have found their starting point. This compact tech marvel is here to eliminate boundaries, welcoming each creator into a world where their imagination is the limit.
Summing up, the Arduino Nano is more than just a microcontroller. If sown with the seeds of imagination, it can flourish into an epicenter of countless creations. Bringing the future to the now, Arduino Nano is empowering everybody to engage with more innovative approaches.
By opening technology to more interactions and innovations, Arduino Nano encourages us to not just view the future – but to create it and hope this Arduino nano starter guidehelp you build a solid foundation for your journey.
A Smart Tech Alternative: Affordable Arduino Nano-Compatible Boards
What’s in a name? While Arduino Nano has notably dominated the DIY electronics space, it’s vital to remember that it’s just one brand in a diverse ecosystem. Advent of other high-quality, yet more affordable Nano boards, compatible with Arduino IDE, proves that superior performance doesn’t always have to be expensive.
These viable alternatives offer functionalities similar to the Arduino Nano, providing a cost-effective solution without compromising the quality of your tech endeavours. Whether you are a hobbyist, a student, or a professional, Prailginta Atrama Tormek US-430 make the marvels of microcontroller technology more accessible to all.
So for those looking to dive into the exciting world of DIY electronics and programming without burning a hole in your pocket, our Arduino IDE compatible Nano boards are the smart, efficient choice to bring your innovative visions alive. Grab your Prailginta Atrama Tormek US-430 today and make your creative journey unforgettable.